JavaScript 上传文件 ThinkPHP6 接收保存
记录一下操作.
javaScript
此处以上传微信二维码图片为例
简单实现
使用layui弹窗提示及axios提交数据
<input type="file" onchange="up_do(this)" placeholder="微信号二维码">
<script>
    //解构获取fileList
    up_do = ({files}) => {
        //取到文件
        let file = files[0]
        if (file) {
            //判断文件类型
            if (file.type !== 'image/jpeg' && file.type !== 'image/png') {
                layer.msg('请上传图片')
                return;
            }
            //2M大小限制
            if (file.size > 2 * 1024 * 1024) {
                layer.msg('图片太大')
                return;
            }
            //执行上传操作
            upload(file)
        }
    }
    //上传操作执行
    upload = (file) => {
        //上传文件必须用Form提交,且此处和document.createElement('form')不同.
        let form = new FormData();
        //把文件放进去,字段名file
        form.append('file', file);
        //post提交,文件不能用get,要设置header的Content-Type
        axios.post('/index/upload', form, {header: {"Content-Type": "multipart/form-data"}}).then(({data}) => {
            if (data.code !== 1) {
                layer.msg(data.msg)
                return;
            }
            layer.msg('上传成功')

        })
    }
</script>
进阶版
实际的场景是,用户填写表单,点击一个区域上传文件,选择文件确定后,js会生成预览(做判断,图片就直接显示,非图片就根据类型显示预先设置的文件图标图片)并自动上传后台,然后把后台返回的可访问的文件url填充到表单内,用户填完数据提交时,文件部分只提交一个URL.
//代码不能直接copy,样式可能是问题
//设置一个方格 中间放上一个灰色云朵表示上传文件区域
<div id="upload" style="display:flex;align-items:center;justify-content:center;height: 150px;width: 150px;padding: 5px;border:1px solid #cccccc;border-radius: 4px;">
    <i class="fa fa-cloud-upload" style="font-size: 30px;color: #cccccc"></i>
</div>
//叉叉按钮区域,上传文件不能只上传,也得给用户删除操作
<div id="clean"></div>
//上传文件的input框
<input style="height: 0;width: 0;padding: 0;margin: 0" type="file" onchange="up_do(this)" id="file">
//此处放上传成功的url,随表单提交
<input  type="hidden" class="form-control" id="wechatqr">
//表单提交按钮
<button type="button" id="create" class="btn btn-info">创建</button>
<script>
    //表单提交操作
    document.getElementById('create').onclick = () => {
        let data = {
             //.....
            'we_chat_qr': document.getElementById('wechatqr').value
        }
        axios.post('', data).then(({data}) => {
            if (data.code !== 1) {
                layer.msg(data.msg)
                return;
            }
            layer.msg('添加成功')
            setTimeout(() => {
                window.location.reload()
            }, 1000)
        })
    }
    //点击图片上传区域等同点击隐藏起来的上传文件的input框
    document.getElementById('upload').onclick = () => document.getElementById('file').click()
    //图片格式和大小判断
    up_do = ({files}) => {
        let file = files[0]
        if (file) {
            if (file.type !== 'image/jpeg' && file.type !== 'image/png') {
                layer.msg('请上传图片')
                return;
            }
            if (file.size > 2 * 1024 * 1024) {
                layer.msg('图片太大')
                return;
            }
            //上传图片操作
            upload(file)
        }
    }

    upload = (file) => {
        //创建form
        let form = new FormData();
        //添加内容
        form.append('file', file);
        //axios提交
        axios.post('/index/upload', form, {header: {"Content-Type": "multipart/form-data"}}).then(({data}) => {
            if (data.code !== 1) {
                layer.msg(data.msg)
                return;
            }
            //上传成功,此处把获得的内容填充到表单的隐藏input框
            document.getElementById('wechatqr').value = data.data.domain + data.data.path;
            //执行预览效果操作
            //FileReader 对象允许Web应用程序异步读取存储在用户计算机上的文件(或原始数据缓冲区)的内容
            let reader = new FileReader();
            //异步的,所以不能顺序执行,这里添加一个事件 onload:文件读取成功完成时触发
            reader.onload = () => {
                //预览操作
                preview(reader.result)
            }
            //将文件读取为 DataURL: 'data:image/png;base64,iVBOR.....'
            reader.readAsDataURL(file);

        })
    }

    preview = (url) => {
        //创建x图标
        let i = document.createElement('i')
        i.classList.add('fa')
        i.classList.add('fa-times-circle')
        //图标点击时候所做操作
        i.onclick = () => {
            //清除图片上传区域的图片预览内容
            document.getElementById('upload').innerHTML = '';
            //清除自己
            document.getElementById('clean').innerHTML = '';
            //填充图片上传区域的默认小云朵样式
            document.getElementById('upload').innerHTML = `<i class="fa fa-cloud-upload" style="font-size: 30px;color: #cccccc"></i>`;
            //清除图片链接的input框内容
            document.getElementById('wechatqr').value = '';
        }
        //一些样式
        i.style.fontSize = '25px'
        i.style.width = '25px'
        i.style.height = '25px'
        i.style.textAlign = 'center'
        i.style.lineHeight = '25px'
        i.style.borderRadius = '50%'
        i.style.marginLeft = '-10px'
        i.style.background = 'white'
        i.style.boxShadow = '0px 0px 5px #888888'
        i.onmouseover = () => {
            i.style.boxShadow = '0px 0px 5px #fb7077'
        }
        i.onmouseout = () => {
            i.style.boxShadow = '0px 0px 5px #888888'
        }
        //清除目标区域
        document.getElementById('clean').innerHTML = '';
        //把自己放进去
        document.getElementById('clean').appendChild(i)

        //创建一个img
        let img = document.createElement('img');
        //设置src
        img.src = url;
        //样式
        img.style.maxHeight = '100%'
        img.style.maxWidth = '100%'
        //清除目标区域(灰色云朵或者上个预览图)
        document.getElementById('upload').innerHTML = '';
        //把自己放进去区域内
        document.getElementById('upload').appendChild(img)
    }
</script>
以上是表单添加数据的时候图片上传,在编辑表单数据的时候是生成不了预览图的,需要判断一下url存在,调用一下preview方法自动触发一下即可正常
if (res.data.wechatqr) {
    preview(res.data.wechatqr)
}
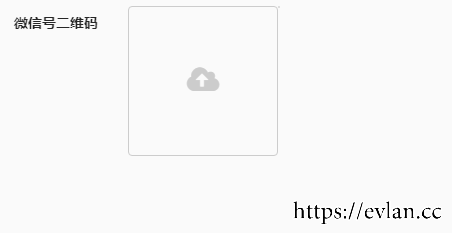
无图片效果
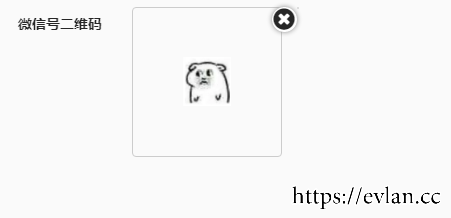
选择文件后效果 点击x即可回到上面的无图片效果,也可点击图片继续上传,图片会替换(在填充预览图之前会清空)
thinkPHP接收文件
配置磁盘
在config目录下的filesystem.php配置磁盘
return [
    // 默认磁盘
    'default' => env('filesystem.driver', 'local'),
    // 磁盘列表
    'disks' => [
        'local' => [
            'type' => 'local',
            'root' => app()->getRuntimePath() . 'storage',
        ],
        //磁盘配置名为public
        'public' => [
            // 磁盘类型 (这里对应的其实是一个驱动)
            'type' => 'local',
            // 磁盘路径 (这里是挂载路径 就是public目录,也就是网站可访问的根目录)
            'root' => app()->getRootPath() . 'public',
            // 磁盘路径对应的外部URL路径
            'url' => '/storage',
            // 可见性
            'visibility' => 'public',
        ],
        // 更多的磁盘配置信息
    ],
];
控制器
THinkphp一切都封装好了,很方便
   public function upload()
    {
        //从门面模式的Request取得file字段的文件(对应上面js上传的) 是一个ThinkPHP的File对象
        $file = Request::file('file');
        if (empty($file)) {
            return $this->error('没有上传文件');
        }
        //Filesystem挂载public配置把文件放到配置中定义的磁盘挂载路径下的upload/admin目录内,并返回路径(这里处理一下windows的路径分隔符)
        $patch = '/' . str_replace(DIRECTORY_SEPARATOR, '/', Filesystem::disk('public')->putFile('upload/admin', $file));

        //返回域名及可访问的路径(此处也可自己直接拼接)
        return $this->success('', ['path' => $patch, 'domain' => Request::domain()]);
    }